
Sorting data is an important data analysis practice. Through data sorting, one can quickly visualize and conclude the data. Therefore, this eases the process of finding any data from your excel document. Excel is responsive software as it allows its users to sort data with either number, date and times or color.
In this article, we shall discuss how to sort your data in excel by color.
To get started, you must have installed the Excel application on your pc and launch it. If you don't have the Excel application on your pc, you can visit the Microsoft website and download it from there, and then install it on your Pc. Open a new workbook or an existing excel document.
1.On your Excel main page, click the menu button found on the top left side of the page.
2. Then, click the "New" button.
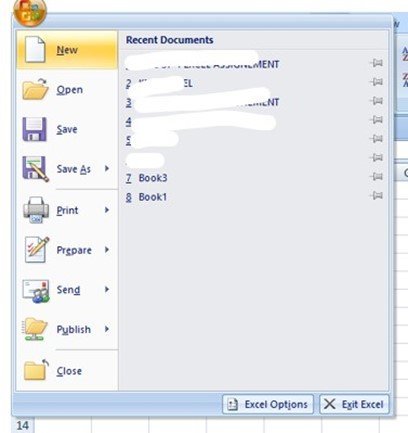
3. Finally, click "Create" to open a new workbook.

4. A new workbook has empty cells. Go ahead and input your details on the cells.
5.Once everything is set, you can now sort your work. Firstly, click on any cell of the column you want to sort.
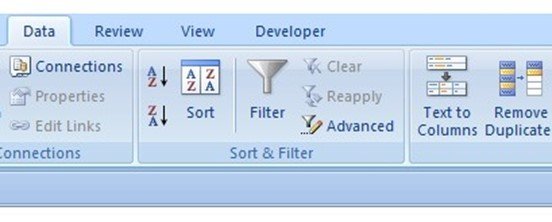
6. Then, locate and click on the Data tab found on the top part of the page.
7. On this bar, locate the "Sort & Filter" section. Click the Sort button. This feature allows one to select the mode of sorting the data.
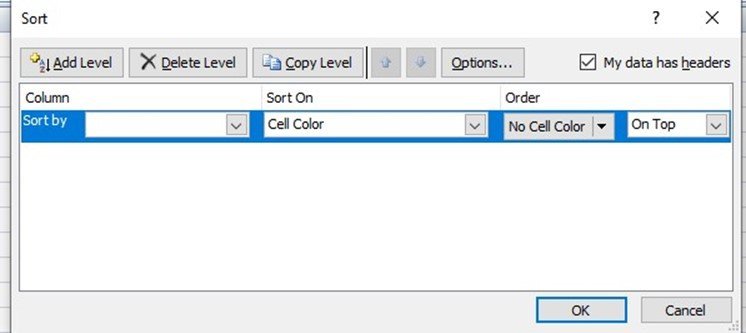
8. Upon clicking the "Sort" button, a sort dialogue box pops up. This is where you select how your data will be sorted.
9. Under Column, in the sort by box, click the drop-down menu to select the column you want to sort.
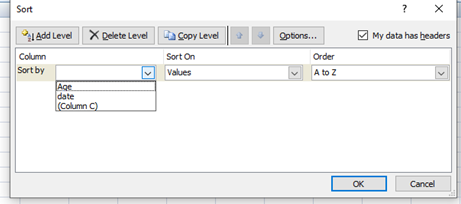
10. Then, change the Sort on mode. To do so, click on the drop-down menu below the Sort on section and select either cell color, font color, or cell icon.
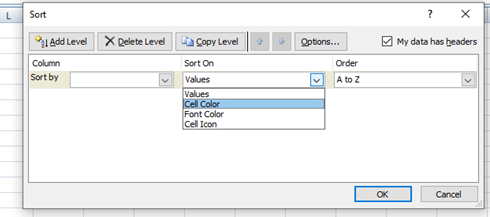
11. Finally, click the dropdown menu next to "no cell color" and select the color you like.
In case your document has more than 1 row, you can still sort it using the "Sort by color feature" to have more than one color.
Here is how to go about it:
1. Just like the previous steps, open an existing document or create a new one. Then, click on any cell with your document. The selected cell should be below the one selected previously.
2. Locate and click on the Data tab on top of your Excel page. Access the Sort section. using the above method, sort the first column. sort the next column by following these steps.
- After you're done with setting up the sorting properties of the selected rows. Click the "Add level" button the dialogue button.
- A "Then by" row, opens on the Dialogue box. Go ahead and edit its properties and this time choose a different color.
- Finally, click the "Ok" button.

You can do this repeatedly to add different colors to your rows. This makes the workbook much readable.