If you're looking for a way to change the present date to a text, all you need to know is to make use of the TEXT function in Excel together with the TODAY function, which returns the present date, e.g
=TEXT(TODAY(), "dd-mmm-yyyy")
The outcome of this operation will display 08-Mar-2015. If you would love to showcase the outcome of the text string in other formats, you need to take a look at the date codes explained in example 1.
Example 4. TEXT formula in Excel to change a text to a date
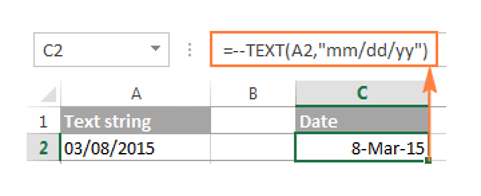
Although the main job of the TEXT function present in the Worksheet is changing numbers to Text, it can also carry out the opposite conversion ( converting a text to date). To do this, you attach the double negation (–) to the TEXT formula.
For instance, to change a text string to a date in cell A1, you make use of the formula below and then arrange the cell as a date.
=–TEXT(A1,"mm/dd/yy")
A TEXT approach in changing texts to dates: Using Excel's Text to Columns wizard to change dates to texts
From all of the above, there is no doubt that the TEXT function in Excel offers its best per changing dates to texts. But if you are not too good with this Excel approach, this might be helpful to you.
In our previous tutorial on the Excel DATE function, using Text to Columns to transform dates to Text was explained. To change dates to texts, you follow the same approach. But in this, instead of choosing Dates on the last step of the wizard, you insert Text.
Note. This function, i.e. (the Text to Column function), changes dates in the default short date approach, not minding how the actual dates are shown in the Worksheet. For more explanations on this, you can check the Default day format in Excel.
If you're not looking for the default date format, you can bypass this function and go to the next, which allows you to change dates to text strings in any format you choose.
In a situation where you don't want to make use of the default format, you can carry out these guidelines:
You click on all the dates you intend to convert in your Worksheet.
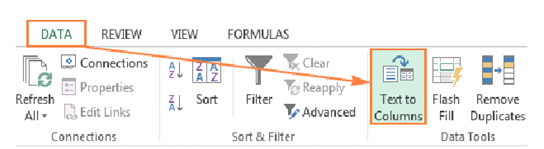
On the Data tab, find the Data Tools group and click Text to Columns.
Switch to the Data tab and click Text to Columns.
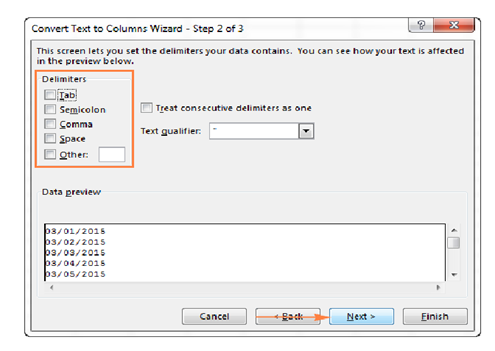
On step 1 of the wizard, select the Delimited file type and click Next.

On step 2 of the wizard, make sure none of the delimiter boxes is checked and click Next. On step 2 of the wizard, uncheck all delimiter boxes and click Next.
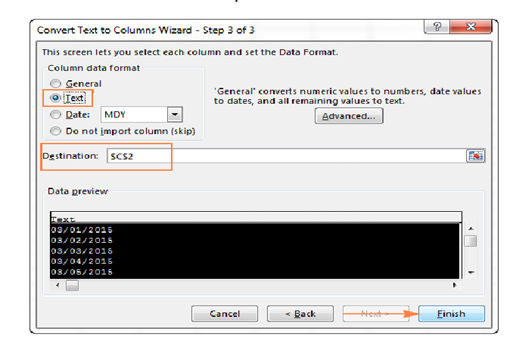
On step 3 of the wizard, which is the final step, select Text under Column data format and click Finish.
Tip. If you don't want the resulting text strings to overwrite the original dates, specify the Destination for the top cell of the new column.
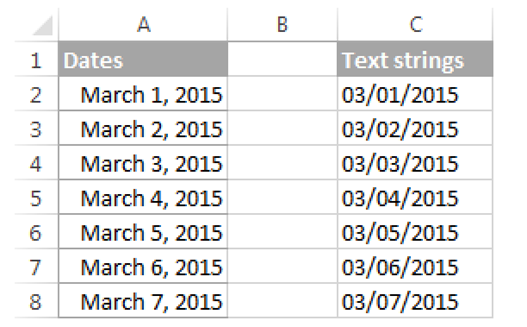
I guess the steps were quite easy. Check the screenshot below for this result of the date conversions to texts. It was done in default format for the short date, "mm/dd/yyyy"