
At times, your worksheet may include blank or unwanted pages. There will be no need to print out all pages hence the need to delete the extra unwanted ones. It is easy to delete unwanted pages in Microsoft Excel. All you need to do is follow the below-listed guidelines, and you will be good to go. These steps apply to Microsoft 365Excel 2010, 2016, and 2019.
The following article gives you two methods of deleting unwanted pages in Microsoft Excel.
How to delete unwanted pages in a worksheet with setting a Print Area Function
This method can be used to delete several unwanted pages in a worksheet, especially blank pages. The following clear guidelines are used.
1. Highlight or select the pages you want to be printed while holding the Ctrl Key.
2. Click Page Layout.
3. Click on Print Area
4. Click Set Print Area
This will print the worksheet with content you want to be printed and ignore the unwanted pages hence deleting them.
How to Delete unwanted pages with Kutools in Microsoft Excel.
This method is effective and faster when your worksheet contains many pages. It will help you delete all blank rows and columns to minimize the size of your worksheet and print out only the necessary pages.
Kutools for Excel is first downloaded and installed to the device before you can use it in this method. Follow the listed steps below to use this method.
1. Download Kutool to Microsoft Excel
2. Click Kutool and then click Delete
3. Click on Delete Blank Rows>In Active Sheet
4. A box appears showing the list of rows in pages you want to delete. Click OK.
5. Follow the same steps to delete blank columns in your worksheet.
The unwanted pages in your worksheet have been successfully deleted and the remaining piece of work can be printed or saved.
The following simple steps can also be used.
1. Open the worksheet you want to delete unwanted pages from
2. Select the View tab
3. Click on Page Break Preview.
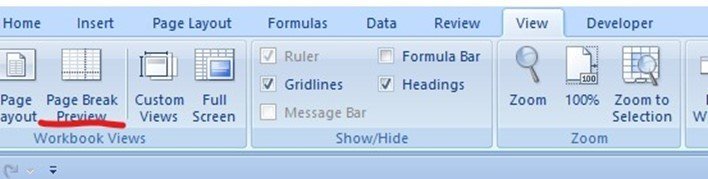
4. A blue dotted line representing the Page Break appears.
5. Select and drag the blue dotted line to reach the size you desire for printing. The dotted line then becomes continuous.
6. After adjusting the page breaks, click on Normal in the Workbook Views group.
7. This automatically gives you the area of the worksheet you desire and deletes the rest.
It is important also to understand how to create page breaks in your worksheet to manage a large document. The following steps will guide you on how to set your print area in Excel.
1. Highlight the area in your worksheet you want to print.
2. Click on the File Tab
3. Choose Print.
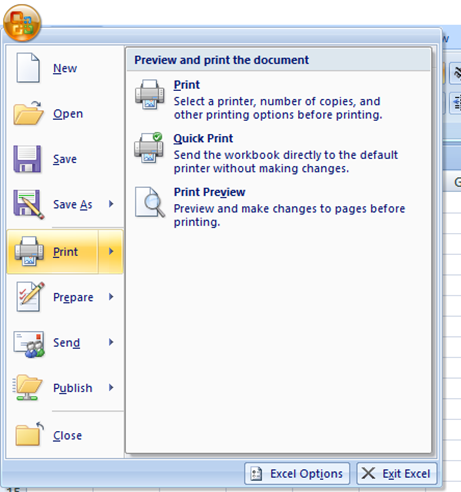
4. Click on Print Selection under Settings. This will automatically print the selected area of the worksheet and leave out the rest, hence deleting unwanted pages.
Whenever there is a need to change the print area on your worksheet Click Print Area> Clear Print Area and repeat the above steps. You are now good to go!